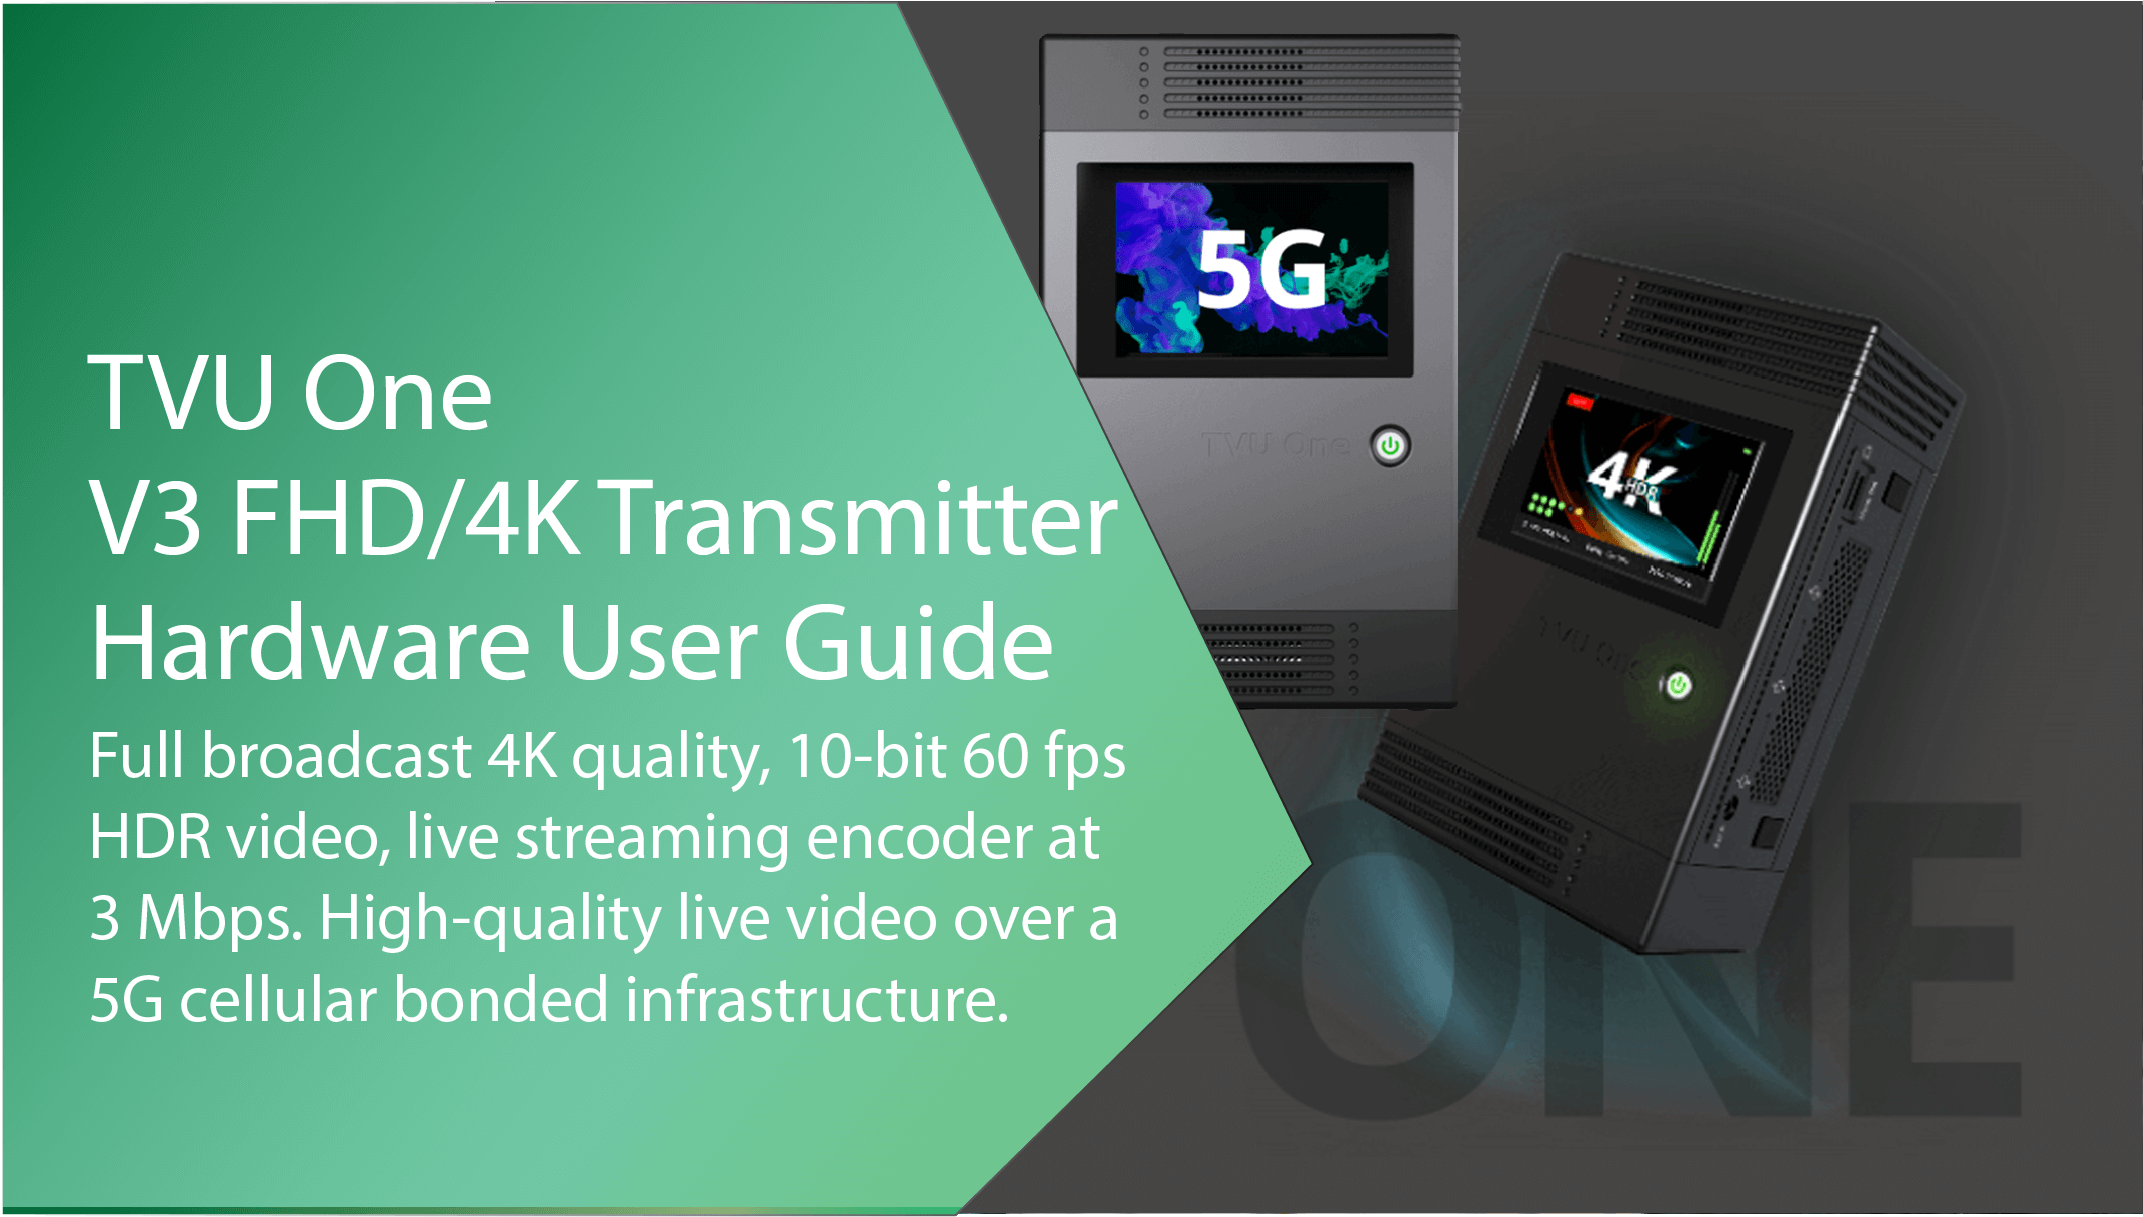
TVU One FHD and 4K Hardware Quick Start User Guide
Introduction, setup, and base operation
Build v7.0 and higher features two LCD console interfaces to choose from. Users can switch to the updated console from the LCD touchscreen.
Product overview
TVU One 4K delivers high-definition picture quality with 0.3-second latency at 3 Mbps. The TVU One FHD and 4K transmitters use the H.265/HEVC or H.264 encoding and compression standard to deliver greater data efficiency and transmission stability.
The H.265 hardware encoding chip delivers full broadcast quality in 4K, 10-bit true 60 fps video at as low as 3 Mbps with proven patented Inverse StatMux technology, ISX.
ISX is TVU’s ultimate transmission algorithm. The TVU One 4K uses less data and combats packet loss to achieve transmissions with virtually zero latency, down to 0.3 seconds, even in a moving vehicle or when going live in 4K.
The TVU One FHD transmitter can also transmit live 1080p-60 at as low as 800 Kbps. ISX offers better utilization of available bandwidth in congested/low-signal areas and has extremely low latency as low as 0.3 seconds on cellular.
Both TVU One transmitter models simultaneously aggregate up to 12 data connections and can obtain bandwidth from anywhere: cellular 3G/4G/5G, WiFi, Ethernet, or satellite.
Real-time dual encoding makes it possible to go live under any network conditions by simultaneously recording a full HD copy of your video for later download.
About this user guide
This user guide provides detailed information about the following topics:
- TVU One component overview
- Setting up the TVU One transmitter
- Charging the battery
- Turning off the TVU One
- Backpack and battery configurations
- Product specifications
Before you begin
Before you begin setting up the TVU One transmitter, it is recommended that you identify the devices you intend to use with the unit, including cameras, cables, power sources, modems, TVU services, and unit accessories.
Read and follow the notes and guidelines in this document before you use your TVU One transmitter:
NOTE: These notices provide important tips, guidance, or advice.
TVU One transmitter components
The TVU One transmitter comprises the encoder, internal battery, and embedded modems. Weighing just 2.2 lb./1 kg, the transmitter fits easily in the average person’s hand.
TVU One Standard components
Standard Components for the TVU One model FHD and 4K transmitters include the following:
- TVU transmitter with SDI/HDMI input
- 1x micro Internal SD slot with 1x Micro SD card (128 GB) Type 10
- USB connections (4x)
- IFB port
- Power supply (AC Adapter)
- TVU One breathable backpack
TVU One controls and operations
TVU transmitter is the central component of the TVU One system. The transmitter handles video capturing, video encoding and transmission, modem management and dialing, and status/monitoring of the system.
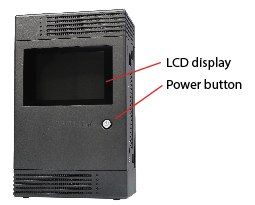
Front panel LCD touchscreen display and power indicator
Press the power button on the front panel to turn on the transmitter. The button turns green when the transmitter is powered on. The LCD touchscreen displays configuration and status information for connected modems, including video input and transmission. When a video input is connected, an input preview is displayed on the LCD touchscreen.
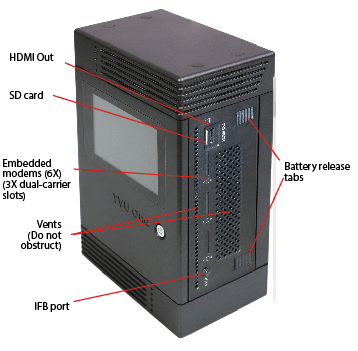
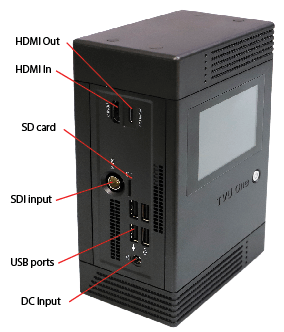
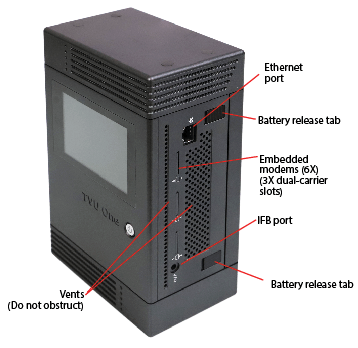
TVU One transmitter side panel overviews
The TVU One transmitter models’ left and right-side panels feature the following input/output connections and controls.
Note: The TVU One transmitters come in alternate form factor designs. The features and functionality are the same.
TVU One transmitter left-side panel (form factor 1)
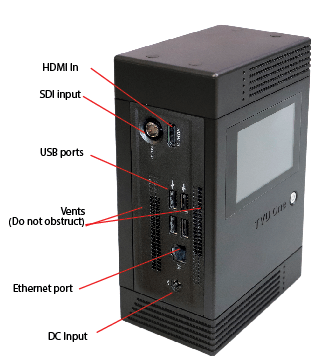
TVU One transmitter right-side panel (form factor 1)
TVU One transmitter left-side panel (form factor 2)
TVU One transmitter right-side panel (form factor 2)
Setting up the TVU One transmitter
This section explains transmitter connections, detaching and charging the battery, how to remove and replace SIM cards, and backpack battery configurations.
Transmitter connections
Complete the applicable steps to set up the TVU One transmitter:
- Connect the HDMI cable or connect the SDI cable to the SDI In port.
- Connect the Ethernet input cable to the Ethernet port for a LAN connection if available.
- Connect your power to the DC Input port.
- Connect the IFB device (3.5 mm mini audio output jack) to the IFB output port.
Detaching the internal battery from the transmitter
The transmitter’s internal battery is designed to fit within the unit but can also be easily removed. Complete battery power management for the TVU One transmitter is available on the LCD touchscreen and the receiver interface.
Complete the following steps to detach the internal battery from the transmitter:
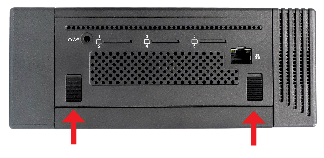
- Users will find two spring-loaded latches on the side of the transmitter opposite the LCD touchscreen.
- Orient the transmitter LCD panel down, push down on the latches to release the battery, and slide it away from the transmitter.
Battery release latches (form factor 1)
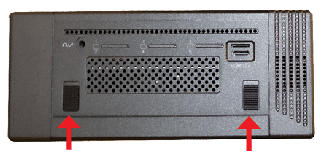
Battery release latches (form factor 2)
Charging the internal battery
To charge the internal battery without removing it from the encoder, connect the provided AC power adapter to the DC input on the unit and plug the other end of the adapter into an electrical outlet. The battery will then begin to charge. When the encoder is turned off, the battery will charge significantly faster (in approximately 3 hours).
The TVU One comes with an AC adapter. To charge the TVU One, connect the AC adapter as shown.

Power button status when charging
The TVU One displays the following power button status when the AC adapter is properly connected and the battery is charging:
- The power button displays a steady green light when the unit is powered on and charging.
- The power button light is off when the battery is charging and the unit is off. The LCD Screen displays the battery charging percentage.
- The power button light is off when the battery is not charged or connected to the unit.
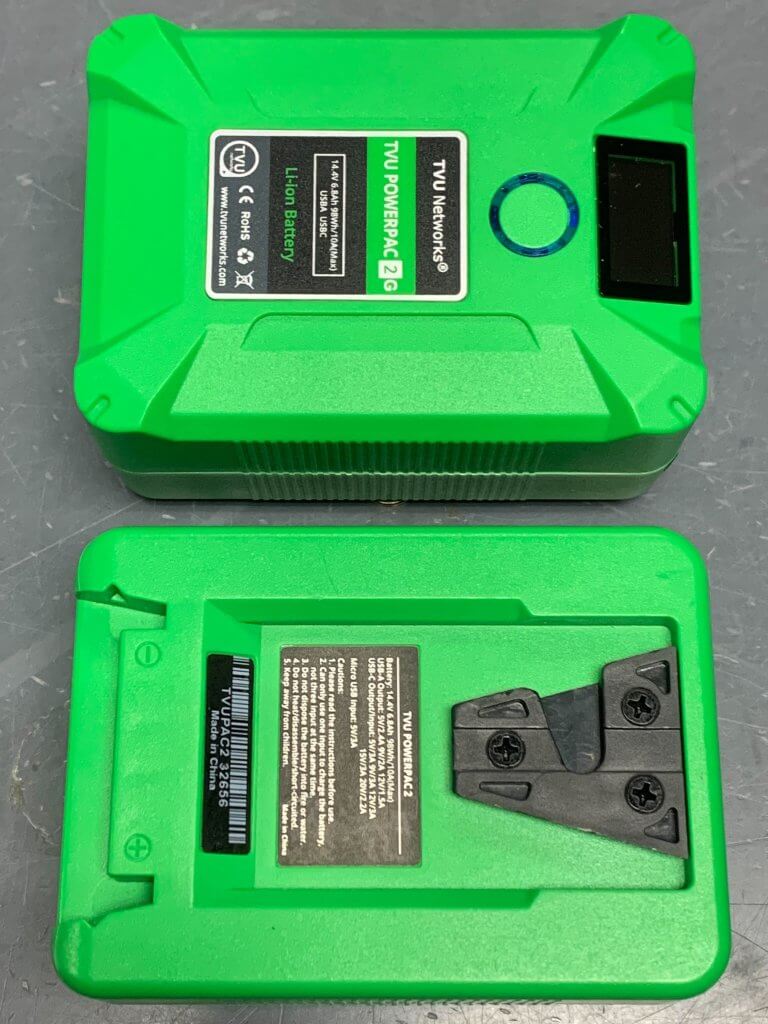
Note: An optional external TVU POWERPAC Li-Ion battery can extend the internal battery runtime. Refer to “TVU One backpack and battery mounting configurations” on page 5 for more information.
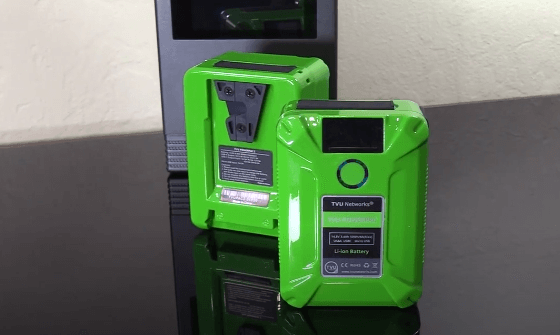
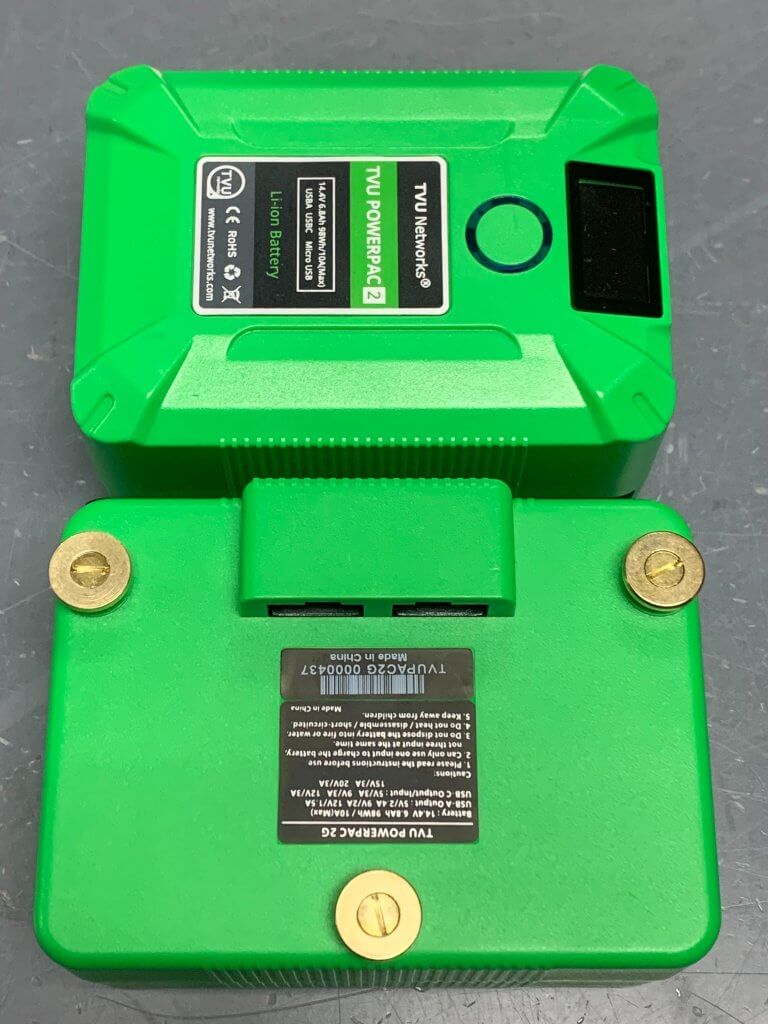
TVU POWERPAC Li-Ion batteries
The TVU POWERPAC Li-Ion battery mounts to the v-mount, g-mount, or gold-mount plates inside the backpack to extend the battery life of the transmitter while in the field.
The TVU POWERPAC 2 Li-Ion battery mounts to the v-mount plate inside the backpack to charge and extend the onboard battery life of the transmitter while in the field. The POWERPAC 2 is able to power your accessories and transmitter simultaneously with the integrated USB C, USB micro, and USB type A interface.
For more information, refer to the POWERPAC Quick Start User Guide.
Inserting SIM cards
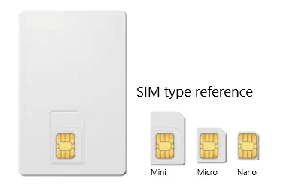
The transmitter SIM card slots are designed to hold up to 6-Nano SIM (4ff) cards in three embedded modem slots. These SIM configurations are user-serviceable.
Note: The transmitter SIM card slots only accept Nano SIM (4ff) cards.
Complete the following steps to insert a SIM card into the embedded modem slot on the transmitter:
Note: The unit must be powered down before inserting a SIM card.
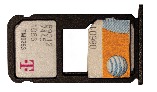
- The TVU One FHD and 4K models feature three dual SIM card carriers for use with the internal modems. To remove a SIM card tray, gently push the end of the SIM tool into the round opening next to the SIM card tray until it clicks and slightly pops out. Carefully pull the dual SIM tray out of the slot.
- Place 2 SIM cards into the dual nano SIM card tray as shown below and carefully slide the carrier into the embedded modem slot. Ensure the SIM cards stay in their respective carrier recesses during this process.
Turning off the TVU One
To turn off the TVU One, complete the following steps:
- Press the power button once. A sliding button will display on the LCD touchscreen.
- Slide the button from left to right to power down the unit.
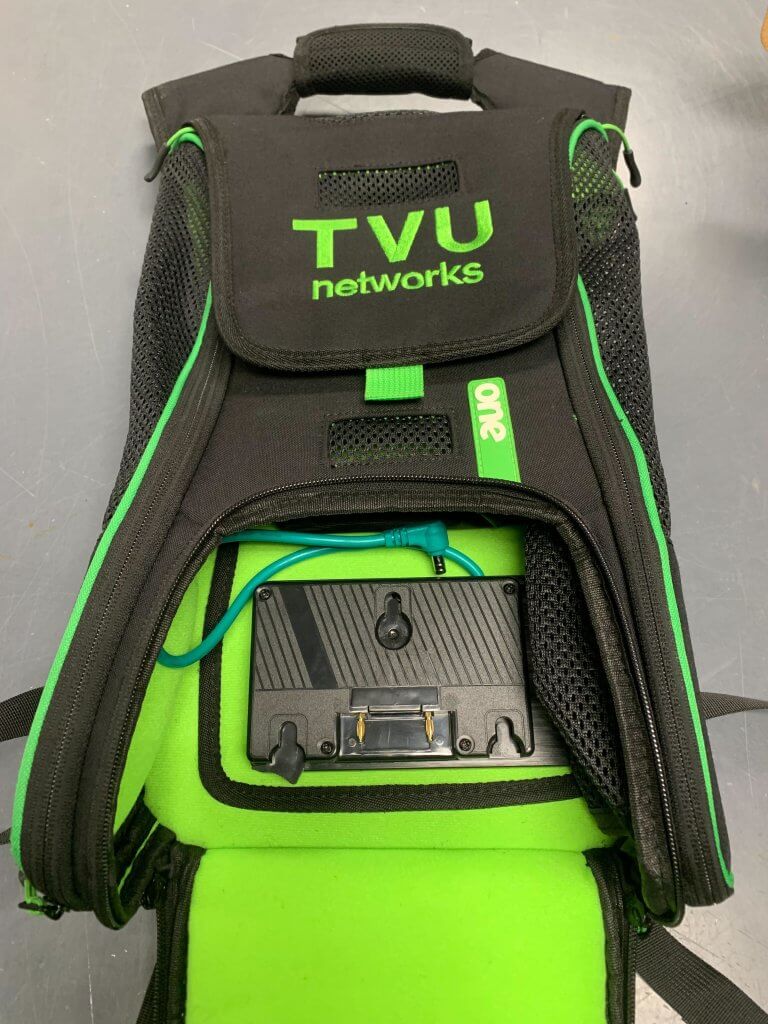
TVU One backpack and battery mounting configurations
The TVU One encoder is designed to transmit from a wearable backpack. The backpack comfortably holds the pack while allowing users easy access to the power button and connections.
The touchscreen LCD interface on the pack can also be used while the unit is in the backpack. In addition, the backpack features breathable mesh that allows for the essential ventilation of the encoder to prevent overheating.
There are three TVU One backpack external battery mounting configurations:
- V-type mounting configuration
- G-type mounting configuration
- Gold-mount configuration
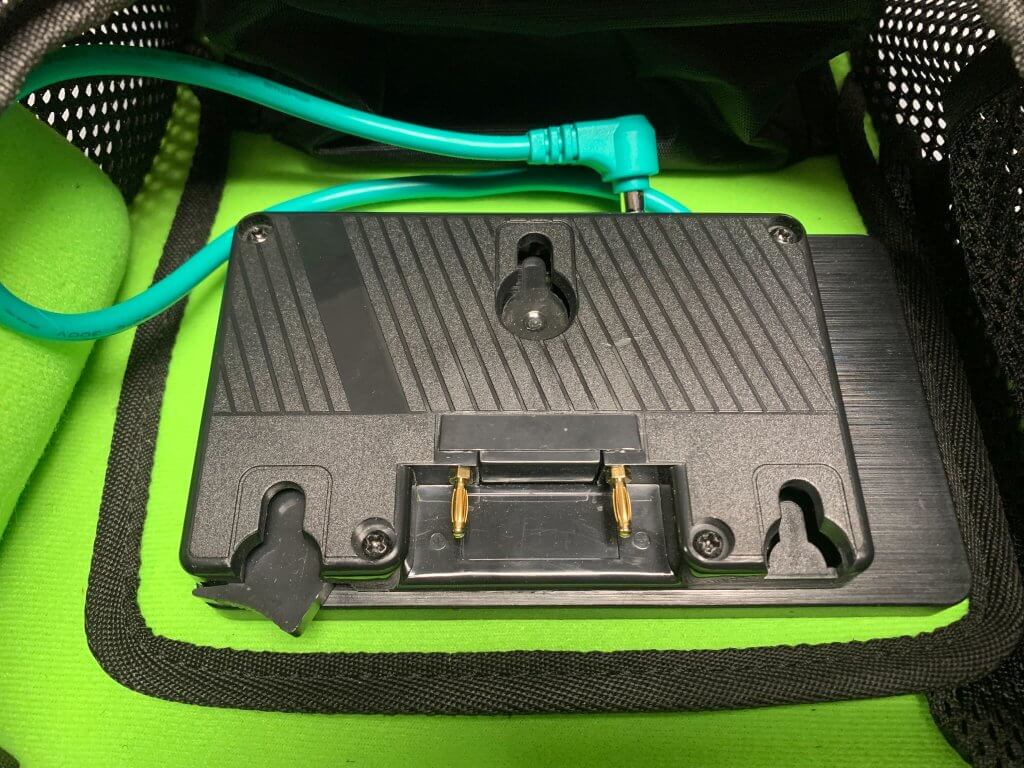
V-type mounting plate configuration
V-type mounting plate configuration:
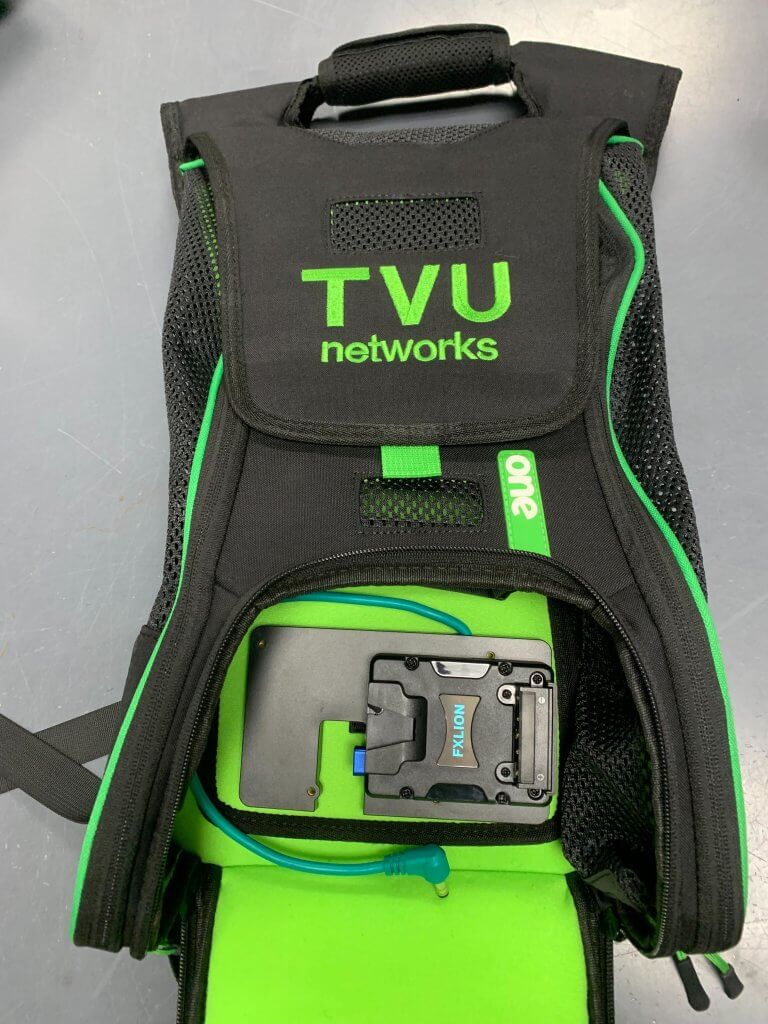
V-type mounting plate and backpack detail:
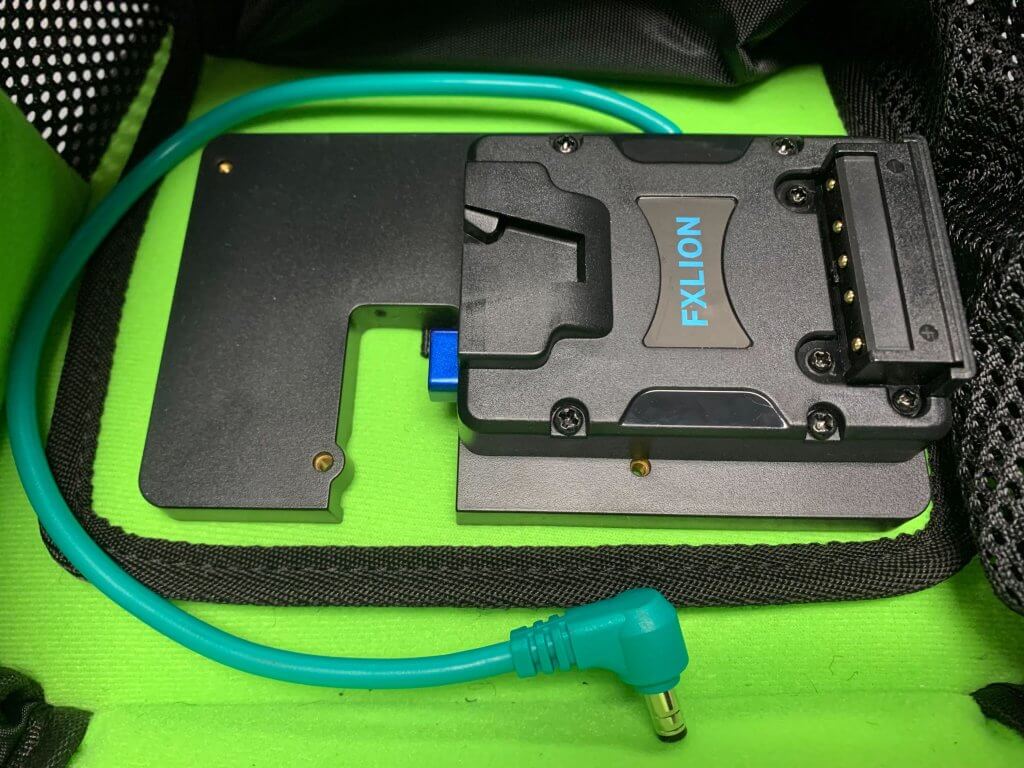
V-type POWERPAC battery:
Gold-mount configuration
Gold-mount plate configuration:
Gold-mount plate and backpack detail:
Gold-mount plate and POWERPAC battery:
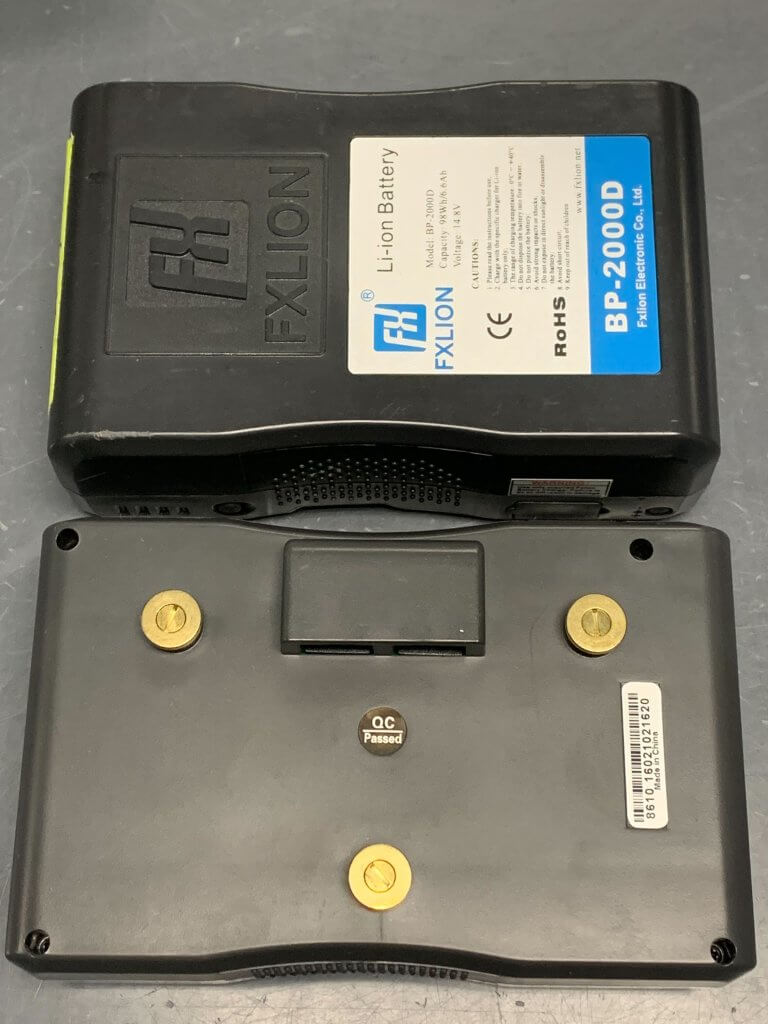
Non-proprietary battery and mounting plates
There are two non-proprietary backpack external battery and mounting plate configurations:
- V-type battery and mounting configuration
- G-type battery and mounting configuration
Non-proprietary V-type battery and mounting plate
V-type battery and mounting plate backpack configuration:
Non-proprietary G-type battery and mounting plate
G-type battery and mounting plate:

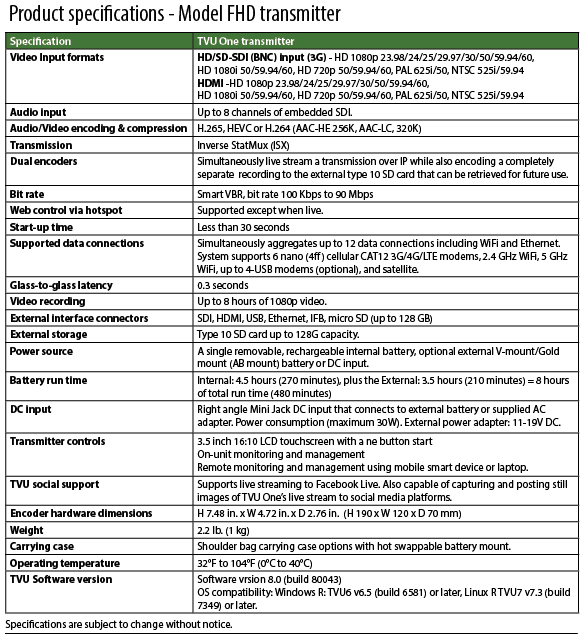
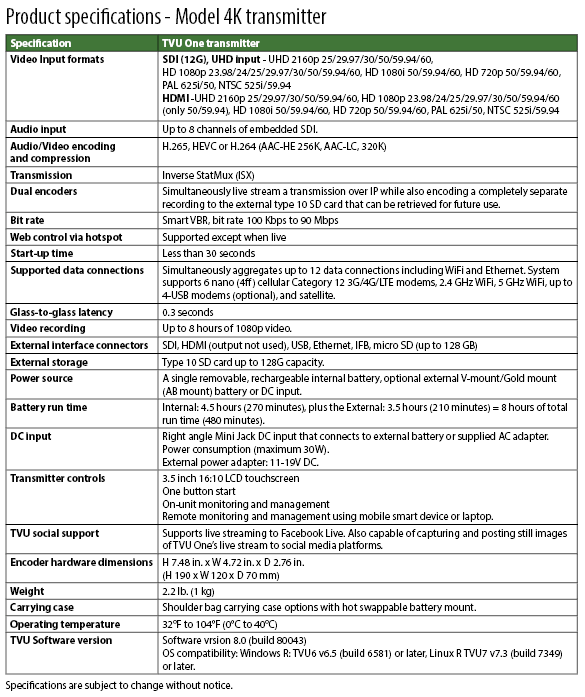
Product Specifications
© Copyright 2025 TVU Networks Corporation. All rights reserved in all media.
Document Part Number: TVU One FHD and 4K HW UG Rev J EN 02-2025