Contents
- Product overview
- TVU Replay features
- System requirements
- Before you begin
- Downloading and installing the App
- Download and install the App – iOS, iPad, or Mac OS
- TVU Replay – TVU Producer Integration Quick Start Guide
- Creating a clip
- Using external controllers
- Chapter 3 – TVU Replay – User experience, features, and behaviors
- Step 1 – TVU Replay App Getting Started
- Step 2 – Create a program
- Workbench interface features
- Filtering your programs
- Collaborator feature
- Program settings menu
- Operational controls and functions
- Playback speed setting
- Adjusting the frame-by-frame playback speed
- Advanced Settings menu
- Keyboard Shortcuts
- Slow-motion playback feature
- Macro configuration panel
- Mark in and Mark out feature
- Playlist preview feature
- Parabola feature
TVU Replay Quick Start User Guide
TVU Replay is a powerful handheld professional wireless replay solution that provides an instant video replay and review system for all sports. It is available as a mobile phone app. Its controls are simple generic gestures used in everyday touchscreen devices. Touching the screen toggles between pause and play and dragging your fingers left and right across the screen allows a user to rewind and fast-forward video sources. The ease of use will enable umpires to become replay operators, removing the need for a dedicated replay system operator.
Product overview
TVU offers two solutions with similar file-based architecture: TVU Replay and TVU Review. This Quick Start User Guide provides an overview and operational instructions for TVU Replay. For information about using the TVU Review solution, refer to the TVU Review Quick Start User Guide.
- TVU Replay is a powerful handheld professional wireless replay solution ideal for sports teams, sports leagues, broadcasters, and production companies.
- TVU Review is a multi-sources video playback solution designed for referees to adjudicate games. The referee can view the session from any location using a tablet, Mac, or smart mobile device.
TVU Networks, the market and technology leader in cloud and IP-based live video solutions has announced a multi-camera control sports app that enables officials to review a play during games instantly and allows producers to include that live video within their coverage. The app is part of an overall modular, micro-service-based building block approach from TVU Networks, with the cloud-based production platform TVU Producer providing management of camera inputs, live feeds, audience interaction, and audio mixing.
Users can control the frame speed in Replay and Review with their fingers on the touchscreen of a phone or tablet or by using a video game controller on a laptop. We’re opening the door to a new, potential talent base by replacing purpose-built replay hardware with a video game controller.
Most replay systems require a dedicated operator with technical skills using a specialized keyboard. Replay is easy to use, and users can learn to use it within an hour. The production team does not need to set up additional devices other than the mobile phone.
With cloud-based technology, any size athletic program can quickly and affordably ensure every call is correct. The big broadcasters have a twelve-camera replay for any nationally televised event. But what about the ones that don’t enjoy such exposure? TVU Replay features easy syncing of an unlimited number of sources. The use of professional cameras is unnecessary. Production teams can access and use production sources as their review system. TVU Replay integrates with TVU Producer to output the source directly.
TVU Replay features
- Easy to capture – Instantly ingest and render review feeds from any source, whether smartphone, tablet, or professional camera. Any internet-enabled camera can connect directly to TVU Replay.
- Easy to operate – With a straightforward interface to control every camera, any official can quickly review any call at any point in the action. Need a different angle? Switch cameras instantly.
- Affordable – What used to require a trailer full of hardware and tons of technical support is now as easy to set up and use as any app you already own. All you need to run TVU Replay is at your fingertips.
- Control it all with one hand – Easily swipe and pinch controls on a tablet or wireless game controller.
- Instant ingest and render of review feeds from any source
- Manage one or multiple cameras from a single interface
- Generate instant clips for output to any device
- TVU device support – TVU Replay can be used with TVU Packs, TVU RPS, and TVU Anywhere as IP sources.
- Use the Replay app to review clips – On Mobile phones and tablets and feed video sources to the recording cloud service via handheld camera.
- Supports iOS, Mac OS, and Compatible smart mobile devices
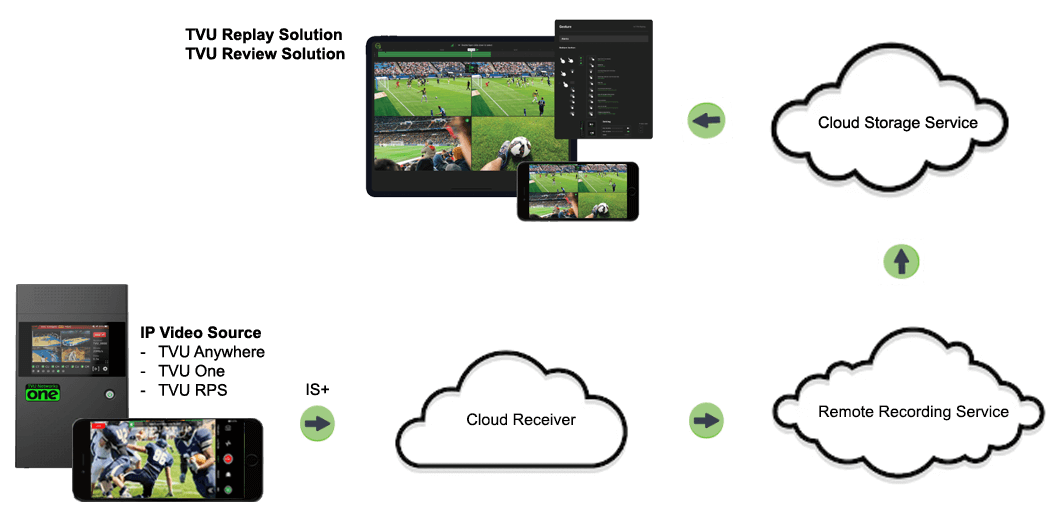
TVU Replay and TVU Review architecture
The Replay and Review architecture is fully cloud-based with no hardware requirement on site. The IP Video Source is sent to a cloud receiver, which records the video signals. Content automatically uploads to the cloud storage drive, and then the Review and Replay solutions will use that recorded video however the user desires. IP sources can be prerecorded clips from a production source or output from a TVU device.
- Support for smart mobile devices – TVU Replay and Review supports iOS, Mac OS, and Compatible smart mobile devices.
- Add, combine, edit, and download video clips from your clip list for social media.
- TVU Replay Integrates with TVU Producer – Easily integrate TVU Replay with TVU Producer for Cloud-based video production.
- TVU Replay Integrates with external controllers – Users can easily control the Replay clip using a ShuttleXpress or Loopdeck controller.
- TVU Review is a multi-source video playback solution – It’s designed to help referees adjudicate games. The referee can view the session anywhere on a tablet, Mac, or smart mobile device.
- TVU Review is Easy to use – You can easily create programs and access your content from the cloud-based Review tool Workbench.
- Import production studio sources – No need for a live camera on site. Upload sources directly into the TVU Review Workbench.
- TVU Review Accepts any IP source and can outsource video anywhere. When using a TVU device, the IP source is 100% frame synchronized.
System requirements
Compatibility:
- iPhone – Requires iOS 11.0 or later.
- iPad – Requires iPadOS 11.0 or later.
- Mac – Requires macOS 11.0 or later.
Before you begin
You must download, install, and register the TVU Replay app. Refer to your appropriate procedure to:
- Download the TVU Replay app
- Install the TVU Replay app
- Register the TVU Replay app
Download and install the TVU Replay app
Step 1 – Installing the TVU Replay app on your Mac OS, iPad, or iOS smart mobile device
The TVU Replay app is available free of charge from the app store. To download the TVU Replay app, complete the following steps:
- Go to the App Store and enter TVU Replay in the search field.
- Download and install the app.
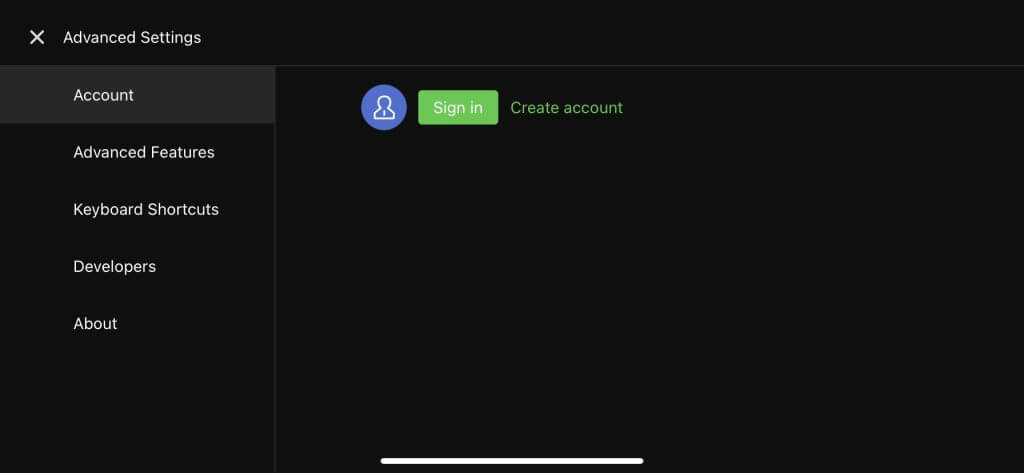
Step 2 – Mac OS, iPad, or iOS smart mobile device account registration
You must sign up to register your TVU Replay account. To finalize your account registration, complete the following steps:
- Go to your Applications and launch the TVU Replay app.
- The Welcome screen displays.
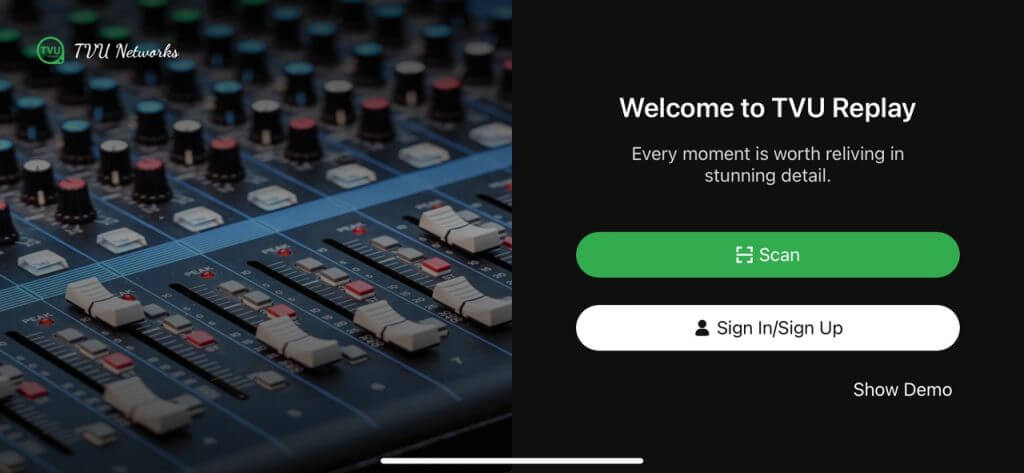
- Press the Sign In/Sign Up button.
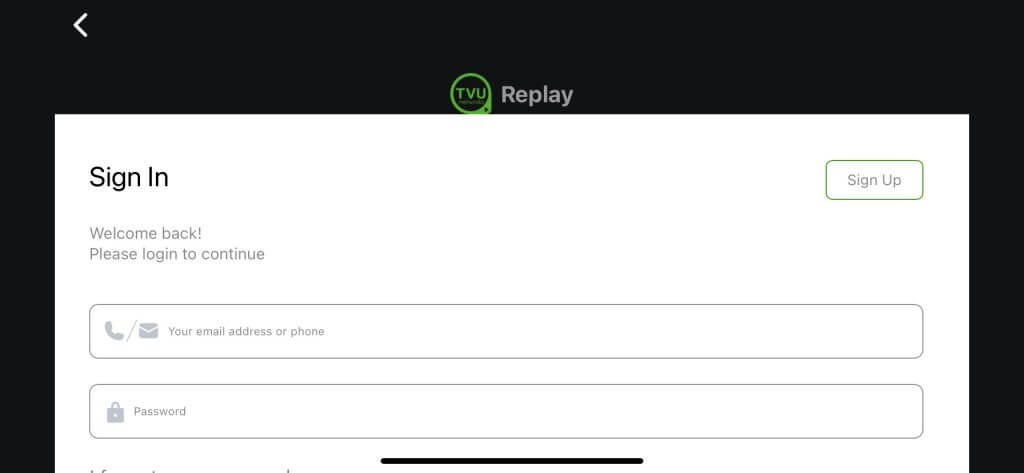
- Press the Sign Up button and enter the required information.
- Press the Sign in or Get Started Now button.
Quick Start guide topics
This Quick Start guide provides users with the following topics:
- Chapter 2 – TVU Replay – TVU Producer Integration Quick Start Guide
- Chapter 3 – TVU Replay – User experience, features, and behaviors
Chapter 2 – TVU Replay – TVU Producer Integration Quick Start Guide
Producer integration overview
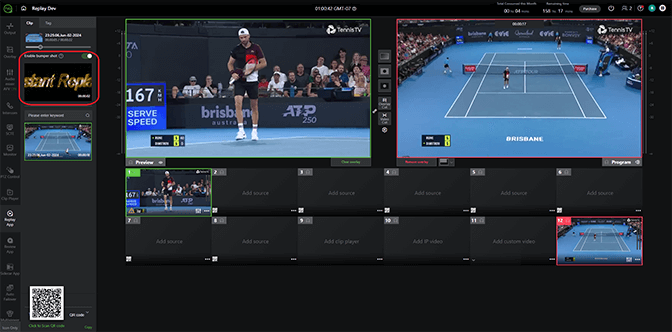
TVU Producer enables users to create replay clips from an active production and save them to the Replay App. You can use the Replay app to customize the highlights of a clip using Replays’ Mark-in and Mark-out features, add commentary, and make it available for production. Saved clips are selectable in the Producer Clip panel. Selecting a clip from the Producer Replay App tab -> Clip panel places it into the Replay preview window in Producer as a selectable source for the director to cut to PGM.
Creating a clip
To create a Replay clip from a Producer session, complete the following steps:
- Log in to the TVU Replay app.
- Sign in to your TVU Producer account. The Producer Workbench displays.
- Mouse over the desired production and click the three dots “…” to open the Program Settings window.
- Click the Replay App checkbox and click Save.

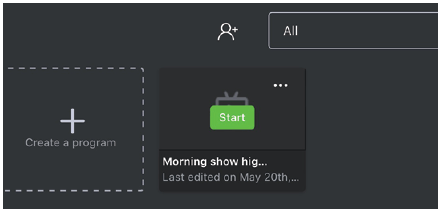
- Mouse over the Project and click Start.
- Wait for the project to initialize.
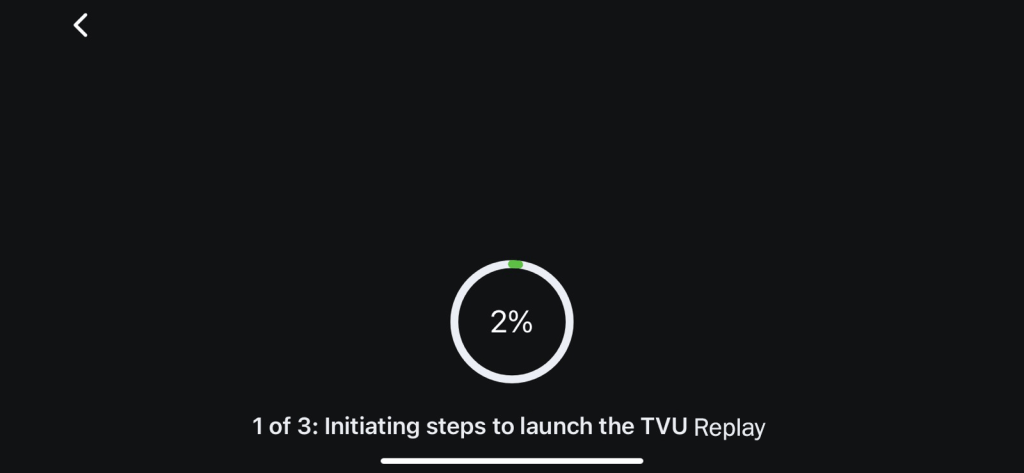
- TVU Producer opens.
- Click the +Add replay source window or the Replay App tab in the left panel. The Clip panel opens.
- Use one of the two methods to authenticate your TVU Producer review session with TVU Replay:
- Authenticate yourself into the review session by selecting an active production in the producer UI; this requires a login.
- You can tap the [-] Scan button on the TVU Replay Welcome screen to log in, scan the QR code with your camera app, or access the URL at the bottom of the Producer review page to authenticate yourself to the producer session.
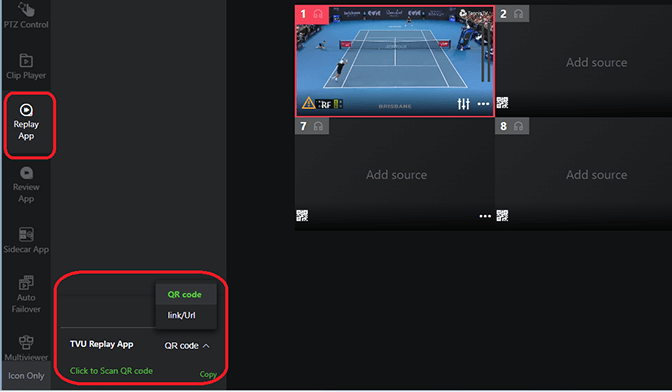
- The Replay app displays the Producer video.
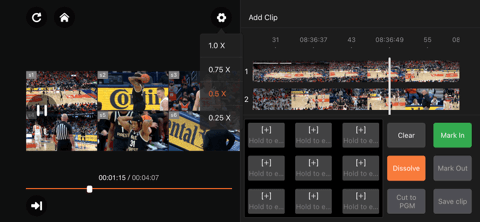
- Tap the green Mark In button. The vertical bar indicates the marked-in state.
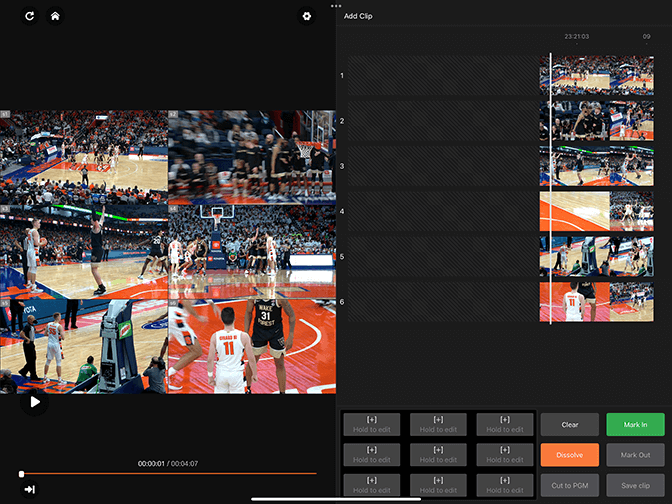
- Tap the green Mark Out button.
- To preview window plays the new clip, tap the Screen to stop the running preview.
- Tap the circular icon(s) in the Add Clip panel to select which sources you want to save. The selected source icons display green.

- Tap the Save clip button to save your selections as a clip, or tap the Cut to PGM button.
- Saved clips are available in the Producer Replay App tab -> Clip panel.
- Select the clip in the Clip panel to add it to the Replay source preview box as a source selection.

- In the Clip panel, users can enable/disable the default bumper shot and upload their own custom bumper shots. For more information, refer to “Operational controls and functions.”
Using external controllers
Replay’s Advanced Settings enables users to customize hotkeys to integrate the Replay app with external controller replay functions.
To integrate Replay with an external controller, complete the following steps:
- Open the Replay App.
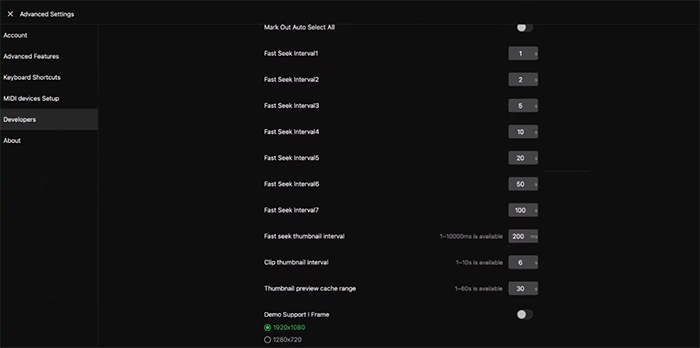
- Tap the Settings gear and select Advanced Settings from the drop-down menu.
- The Advanced Settings window opens. Tap Developers and set the parameters for the operation(s) you want to execute.
- Tap Keyboard Shortcuts and add them to the corresponding parameters you set on the Developers page. Then, Save the hotkeys.
Chapter 3 – TVU Replay – User experience, features, and behaviors
TVU Replay is a synchronized multi-view video player and is part of the TVU Networks’ media supply chain. Users can use TVU Replay to function as an instant replay clip generation in production, and it features:
- It integrates with TVU Producer to cut a clip to PGM or save it to the Replay App for further editing and customizing.
- Replay supports multiple source previews.
- It includes a clip macro and editor.
Step 1 – TVU Replay App Getting Started
To get started with TVU Replay, complete the following steps:
- Launch the TVU Replay app and Sign In.
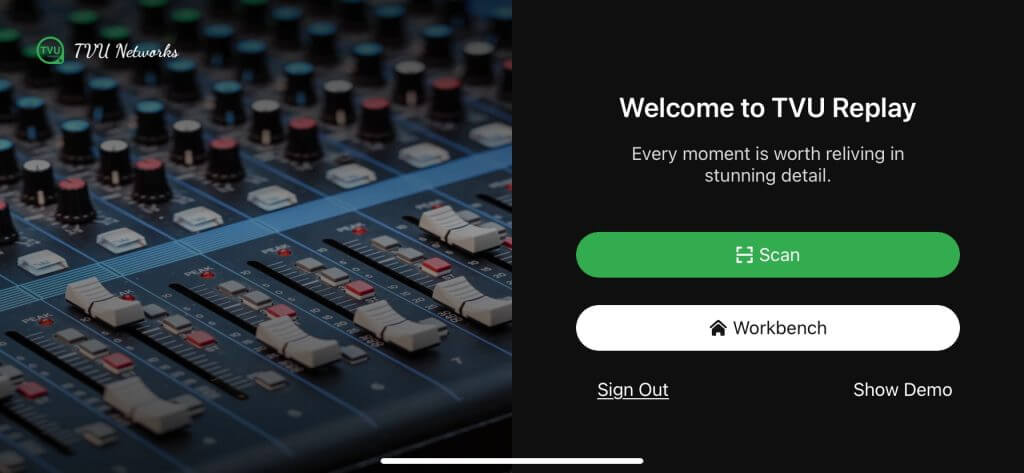
The Welcome screen allows users to:
- Tap the Show Demo link to watch a TVU Review demo.
- Enter the Workbench to create and access programs.
- Scan a QR code to access an active producer session.
- Authenticate yourself into the review session by selecting an active production through the Producer UI; this requires a login.
- To bypass the login, you can scan the QR code or access the URL on the Producer review page to authenticate yourself into the producer session.
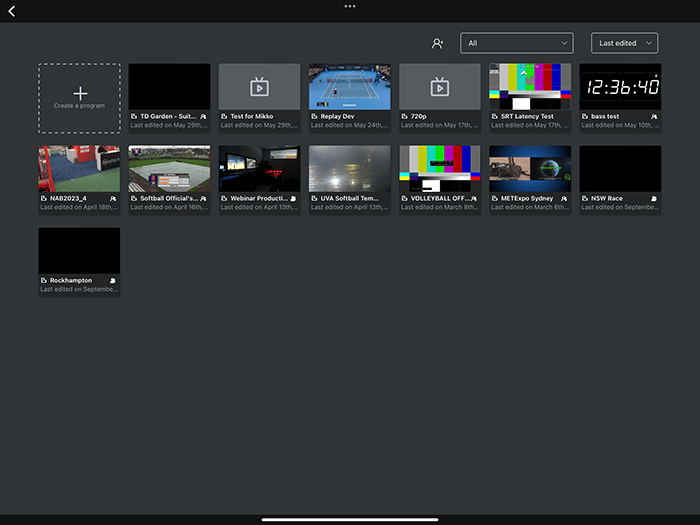
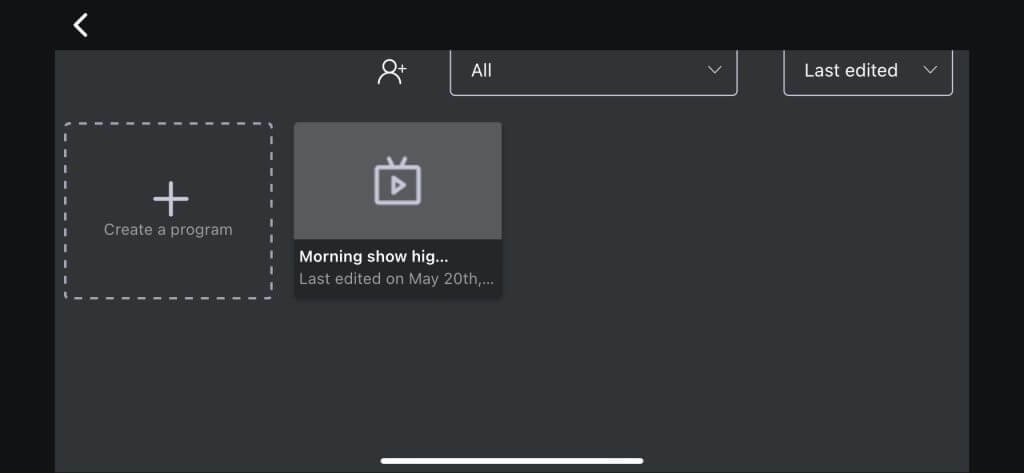
- Tap the Workbench button.
- The Workbench screen displays. You will create, store, select, and organize your programs here.
- Continue to Step 2 to create a program.
- Continue to “Workbench interface features” to explore program features.
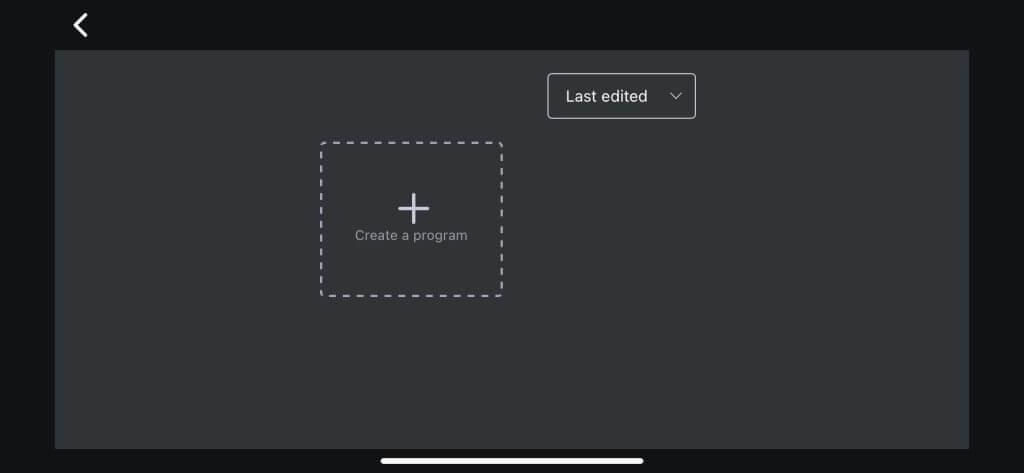
Step 2 – Create a program
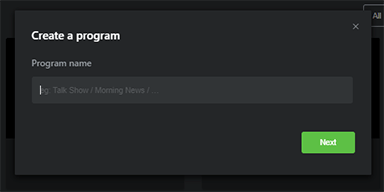
- Tap Create a Program.
- Enter a program name and tap Next to choose your settings.
- Choose a video Format. Input sources should use the same format.
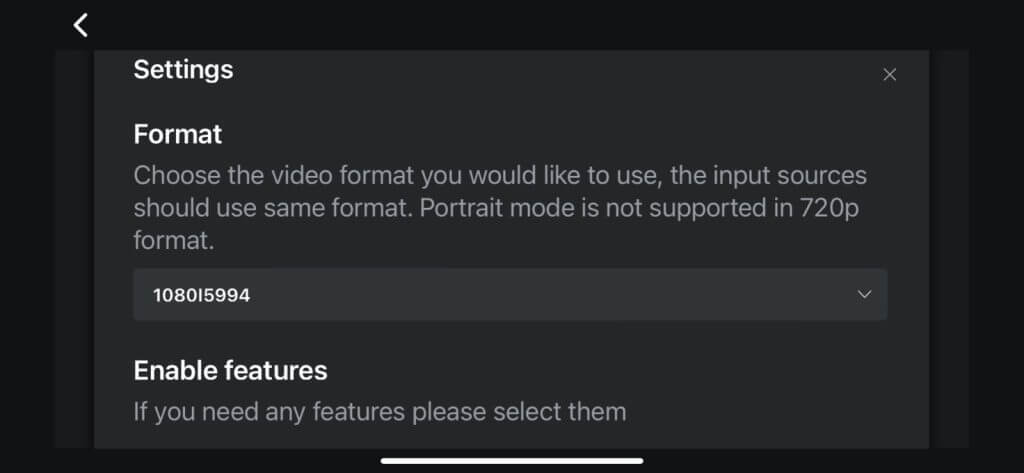
- Select the Replay App checkbox to enable Replay integration with TVU Producer.
- Select the Review App checkbox to enable Review to enable Review integration with TVU Producer.
- If you need additional features, select them:
- RPS – Enable this feature to reserve the productions for RPS sources only.
- Partyline – Enable this feature to integrate a TVU Partyline session.
- Vertical – Select Vertical to preview sources in vertical mode.
- Output buffer – The Output buffer allows a time buffer (up to 300 seconds) between the live Output program and the actual video encoded for output.
- Follower mode – Enable this checkbox to define programs following this main program.
- Source delay control – Enable this checkbox to enable source latency control.
- Input Source Recording – Select which source you want to record. You can find recordings in Cloud Record -> Remote Recording.
- Select your Region.
- Tap Save. Your new program is displayed in Workbench.
Workbench interface features
The Replay Workbench enables users to set up collaborators, filter and display their programs by type, title, last edited, or last created.
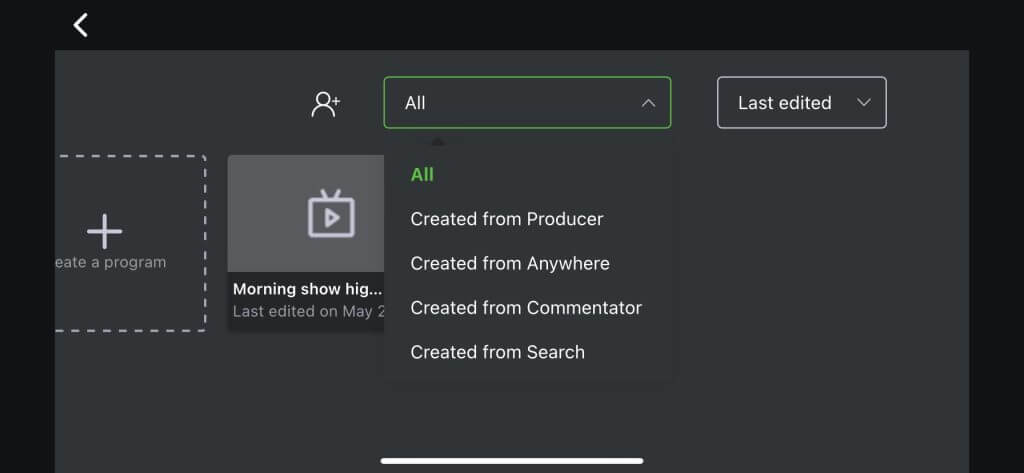
Filtering your programs
- Make a selection from the All drop-down menu. This menu allows users to display programs created by TVU Producer, Anywhere, Remote Commentator, and Search. The default is All.
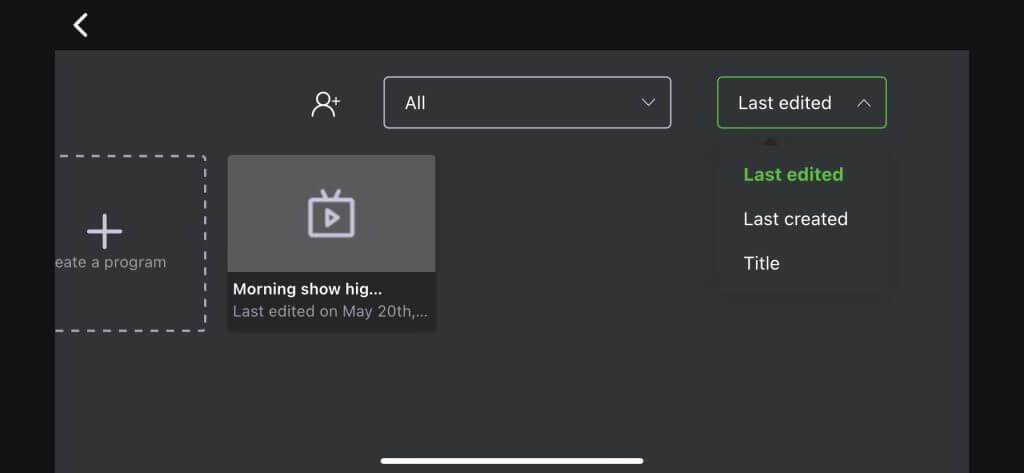
- The Filter drop-down menu allows users to sort and display their projects by Title, Last edited, or Last created.
Collaborator feature
The Collaborator feature enables other Replay account users to share administrative access to programs and sessions. To add collaborators to your production, complete the following steps:
- Tap the Collaborator icon at the top of the screen.
- Select the program checkboxes you want to share.
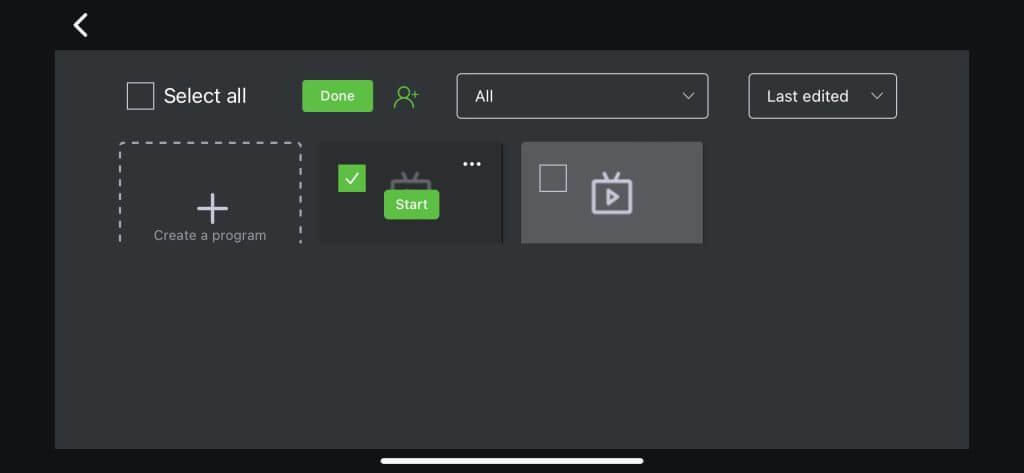
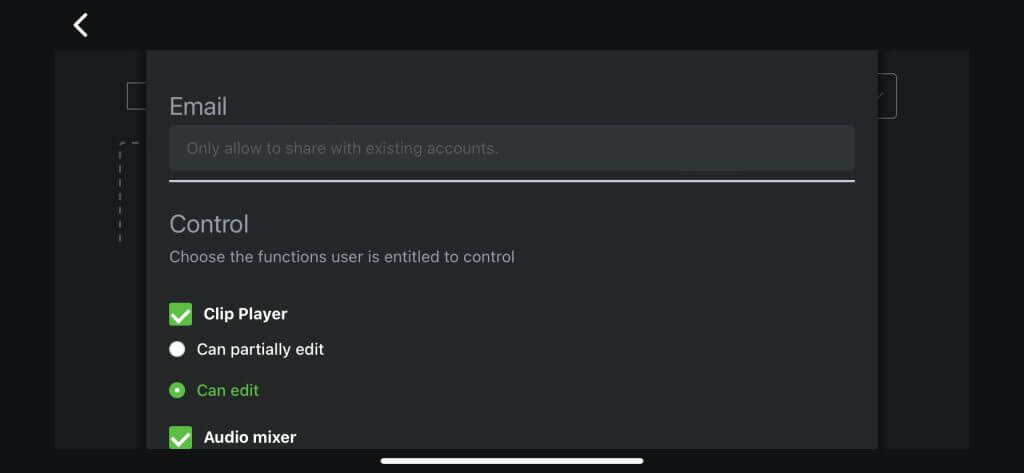
- Tap the green Done button, enter the collaborator’s email, set the collaborator’s controls, and tap Save.
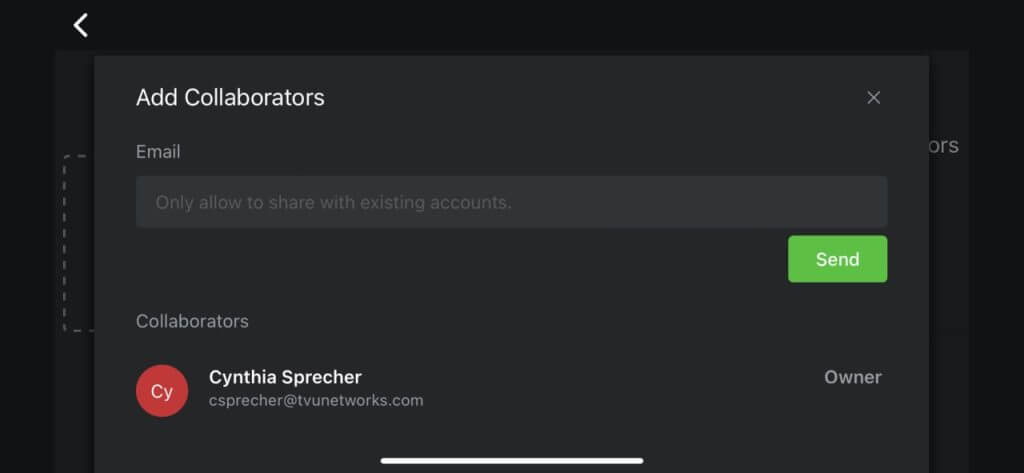
- Tap the three-dot icon and select Add Collaborators. The Add Collaborator window opens.
- Enter the Collaborator’s email with an existing Replay account and tap Send.
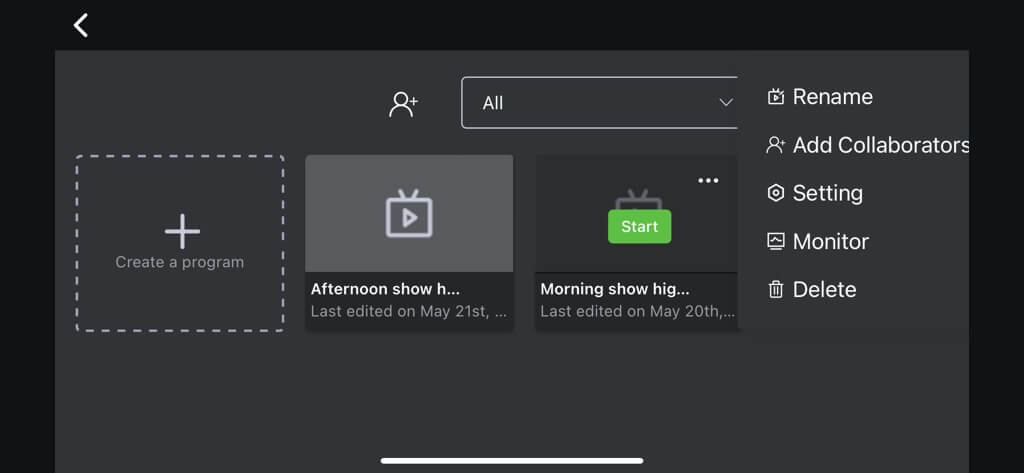
Program settings menu
Each Workbench program can have its unique settings. To access the program setting menu, complete the following steps:
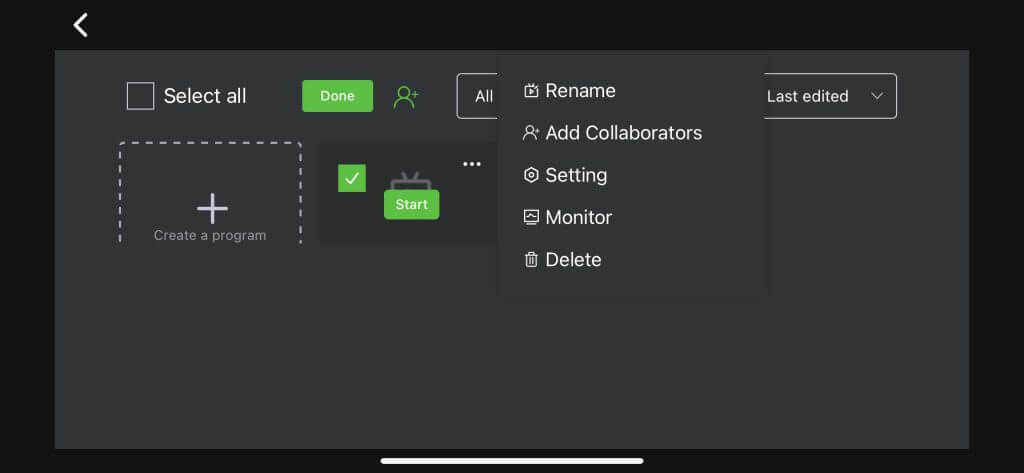
- Tap the program and the three dots “…” at the top-right of the program preview.
- Rename – Tap Rename to change the name of your program
- Add Collaborators – Tap Add Collaborators to add collaborators to your program.
- Setting – Tap Setting to open the program’s settings menu.
- Monitor – Tap Monitor to display your program in its default state (Monitor mode with no preview).
- Delete – Tap Delete to remove a program from Workbench.
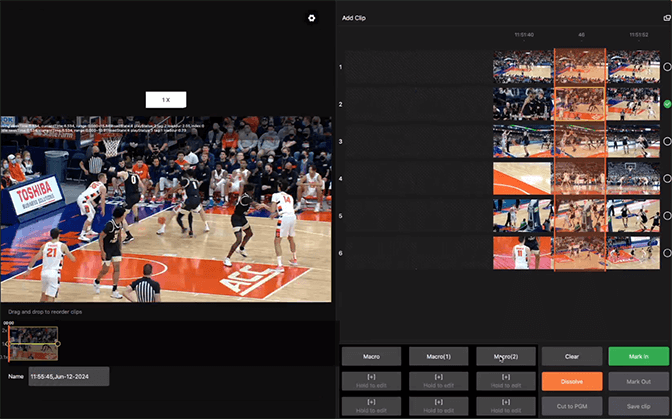
Operational controls and functions
The TVU Replay interface has the following operational controls and functions.
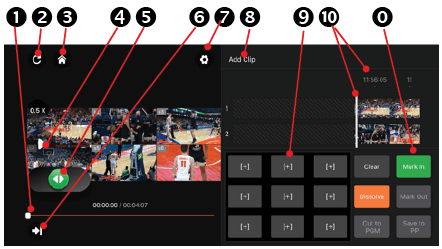
(1) Player bar: The player bar indicates the clip time and can be moved to scroll through a clip frame-by-frame to locate a specific event.
(2) Refresh icon: The refresh icon refreshes a clip’s preview.
(3) Home: Tap this icon to return to the Replay Workbench interface.
(4) Play icon: Tap the Play icon to start and stop playing a selected clip.
(5) Frame seek button: Tap the Frame seek buttons to drag the frames from left to right to locate a preferred frame.
(6) Back to Live button: Tap the icon to jump to the end of the player bar.
(7) Settings icon: The Setting icon opens the settings menu.
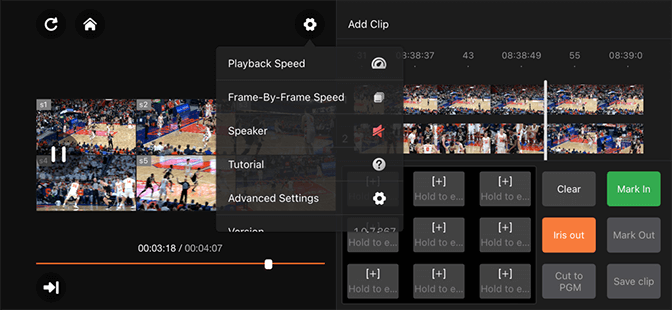
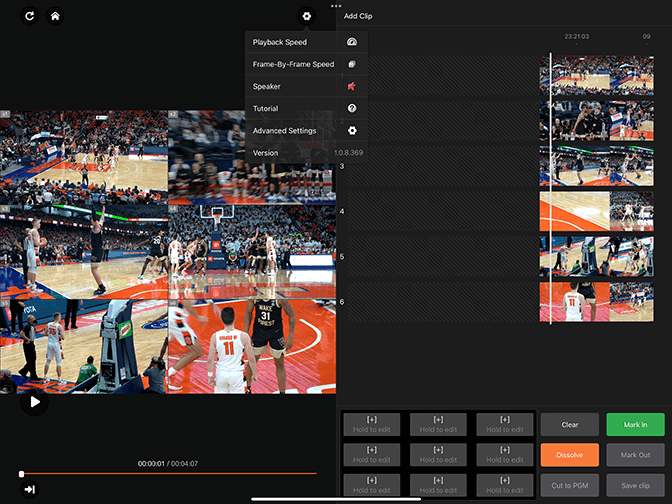
The Setting menu selections are:
- Playback Speed – Opens the Playback-speed bar and displays a clip’s playback speed. Refer to the “Playback Speed Setting” topic for more information.
- Frame-by-Frame Speed – Opens the Frame-speed bar and displays a clip’s frame-by-frame speed. The Settings -> Advanced settings menu enables users to access Account information, Advanced Features, Keyboard shortcuts, MIDI devices Setup, Developers, and About selections. Refer to the “Advanced Settings menu” topic for more information.
- Speaker – This icon can mute or unmute the session audio. This feature allows the user to create and add commentary over a clip.
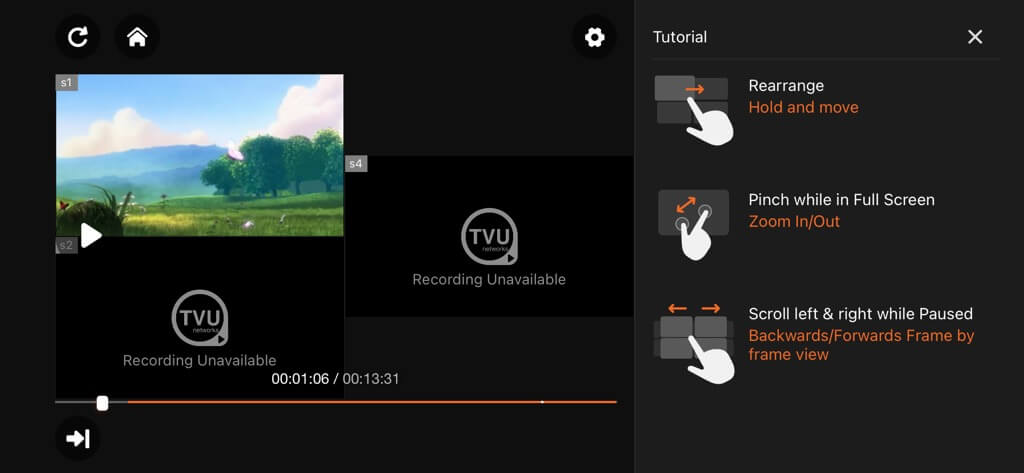
- Tutorial – Displays a how-to-operate tutorial.
- Advanced Settings – Opens Advanced settings for Account information, Advanced Features, Keyboard shortcuts, MIDI devices Setup, Developers, and About selections. For more information, refer to the “Advanced Settings – “Adjusting the frame-by-frame playback speed” topic.
- Version – Displays the software version
(8) Add Clip panel: The Add Clip panel displays editing and configuration controls.
(9) Macro configuration panel: The Macro configuration panel enables users to customize several parameters within the macro to expedite playlist creation.
(10) Clip editing panel: Add clips to the clip editing panel to edit, add transitions, save a clip to the Producer clip panel, and cut your clips to PGM.
(0) Editor panel controls: Edit your clip using the six right-bottom buttons.
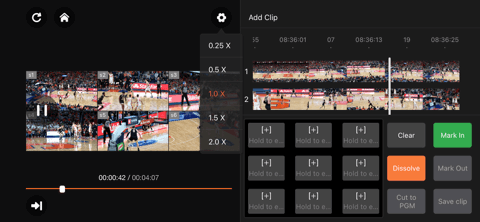
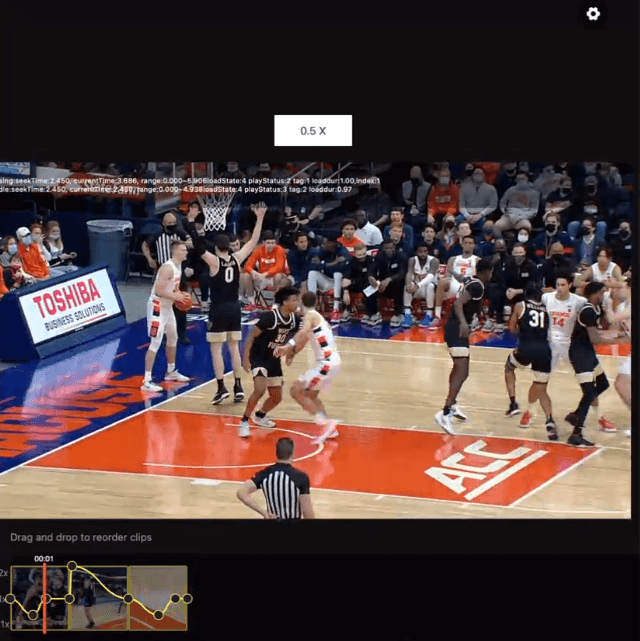
Playback Speed setting
To change the playback speed setting for your session, complete the following steps:
- Tap the clip preview.
- Tap the Setting icon and select Playback Speed.
- Select a playback speed setting from the menu.
Adjusting the frame-by-frame playback speed
The frame-by-frame speed feature enables users to set the slow-motion playback speed of the selected frames.
Note: Refer to the Advanced Settings – Keyboard Shortcut topic to configure keyboard shorts for playback speed.
To use the frame-by-frame speed feature, complete the following steps:
- Tap the Settings icon and select Frame-by-Frame Speed.
- Select a frame speed in the frame speed bar to change the frame-by-frame Playback Speed.
- Tap a frame; it is adjusted according to this speed setting.
Advanced Settings menu
The Settings -> Advanced settings menu enables users to access Account information, Advanced Features, Keyboard shortcuts, MIDI devices Setup, Developers, and About selections.
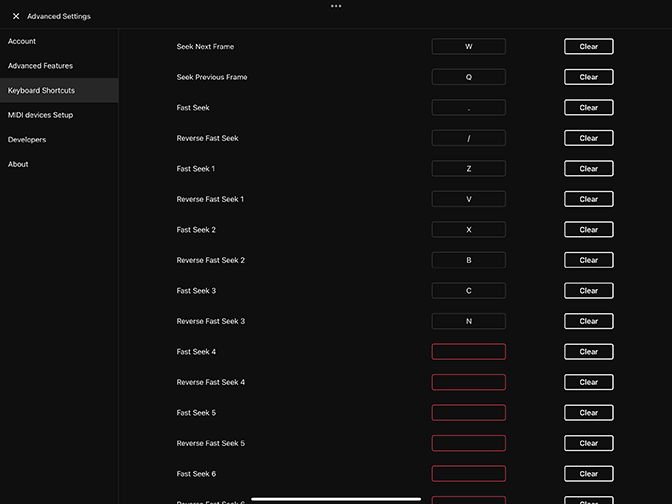
Advanced Settings – Keyboard Shortcuts
- Tap the Settings gear and select Advanced Settings from the drop-down menu.
- The Advanced Settings window opens. Tap Developers and set the parameters for the operation(s) you want to execute.
- Tap Keyboard Shortcuts and add Keyboard Shortcuts to the corresponding parameters you set on the Developers page. Then, Save the hotkeys.
Slow-motion playback feature
The Slow-motion playback feature enables users to adjust the speed control of a marked clip. To use the slow-motion playback feature, complete the following steps:
- Tap the Settings gear and select Advanced Settings from the drop-down menu.
- Tap Keyboard Shortcuts and configure the keyboard shortcut parameter for the desired play speed.
- Configure the T Bar Speed Control parameter and Save the hotkeys.
- Tap Developers and set the corresponding parameters for the speed control you set in Keyboard Shortcuts.
- Select a clip and tap the green Mark In button.
- Tap the green Mark Out button.
- Tap the circular icon(s) to the right of the marked file in the Add Clip panel to select which frame to apply the feature. The circular icons display green.
- Press the keyboard shortcut you configured in step 2.
- The selected frames are displayed below the preview, and the speed is displayed in the white box above the preview window.
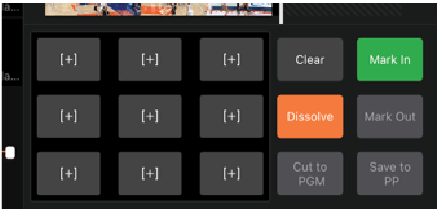
Macro configuration panel
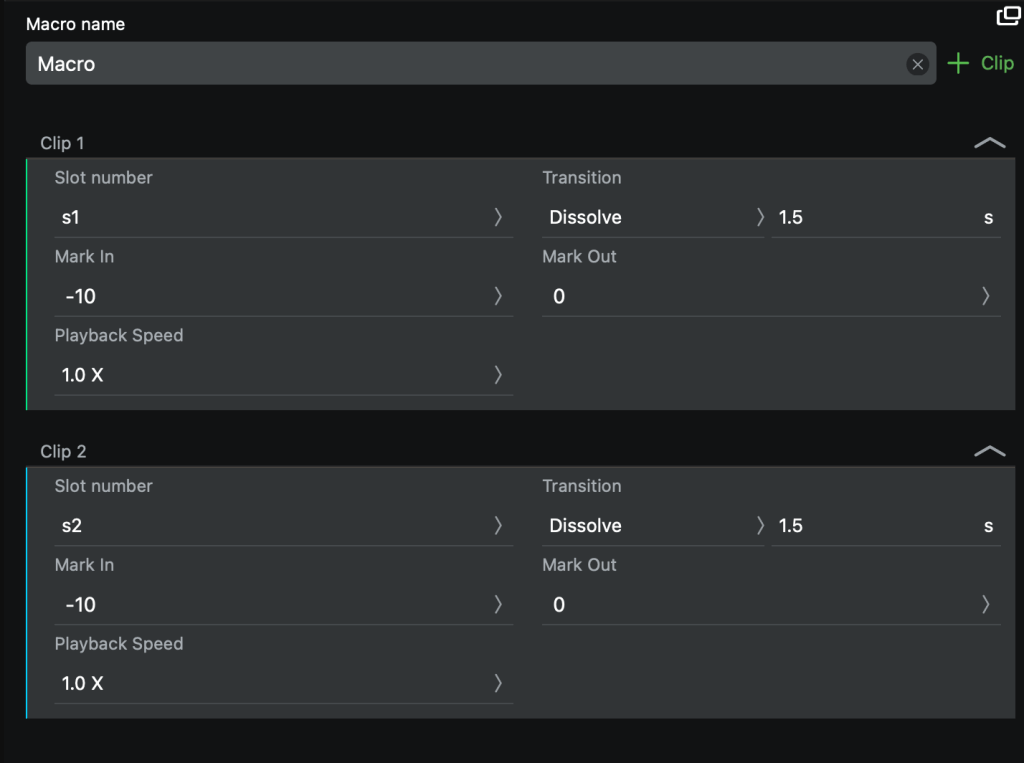
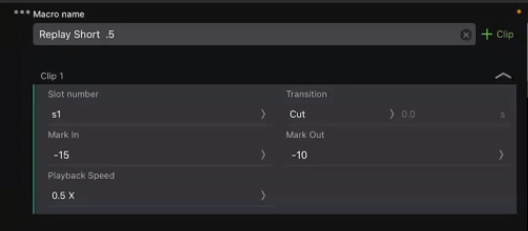
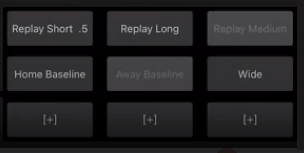
The Macro panel enables users to create and configure up to nine custom Macros to expedite their playlist creation. Macro buttons are displayed in the panel as [+].
There are several adjustable parameters in the macro configuration, as depicted in the screenshot below. Users can customize these parameters within the macro to expedite playlist creation. For instance, consider this screenshot: it demonstrates the generation of a playlist comprising two clips. The initial clip, sourced from slot1, is 10 seconds long with a 1.5-second dissolve transition and 1x playback speed. Similarly, the second clip, sourced from slot2, follows the same settings. By adjusting these parameters according to their preferences, users can streamline the playlist generation process.
To configure a macro, complete the following steps:
- Open a session.
- Select and hold one of the macro slot [+] buttons.
- The Macro configuration panel opens.
- Tap + Clip in the panel’s top-right to add clips to your Macro.
Note: Each clip can be configured with its own parameters.
- Enter a Macro name.
- Set the parameters for each clip:
- Select the Slot number field and tap a preview in the left preview panel.
- Set the Mark In and Mark Out parameters for the clip.

- Select a Transition mode.

- Select the Playback speed.
- Save the clip.
- Tap a macro button to preview the Macro playout.
- The preview displays the parameters configured for the macro button selected.
Mark in and Mark out feature
Users can customize the clip output using the six bottom-right Replay buttons: Mark in, Mark out, Transition (orange), Cut to PGM, Save to Producer. Then, Output them to a program using a running TVU Producer instance.
To add markers to a clip, complete the following steps:
- Select clips in the left clip preview panel.
- Tap the Start icon to play a clip. Tap pause when you locate the beginning of the clip you want to save.
- Tap the Mark In button. The vertical bar indicates the marked-in state in the clip editing panel.
- To end the clip, tap the green Mark Out button.
- If desired, tap the orange transition button to add a Dissolve, Cut, Iris in, or Iris Out transition to the marked clip.
- Tap the circular icon(s) to the right of the marked file in the Add Clip panel to select which sources you want. The selected source icons display green.
- Tap the Save clip button to save your selections as a clip in Producer, or tap Cut to PGM.
- Saved clips are available in the Producer Replay App tab -> Clip panel.
Playlist preview feature
The Playlist preview feature enables users to reorder their marked sessions and save them as a single clip.
- Select and mark your clips using the Mark In and Mark Out buttons.
- Select the clips you want by tapping the circular icon in the Add Clips panel next to each marked session. The frame will be highlighted yellow.
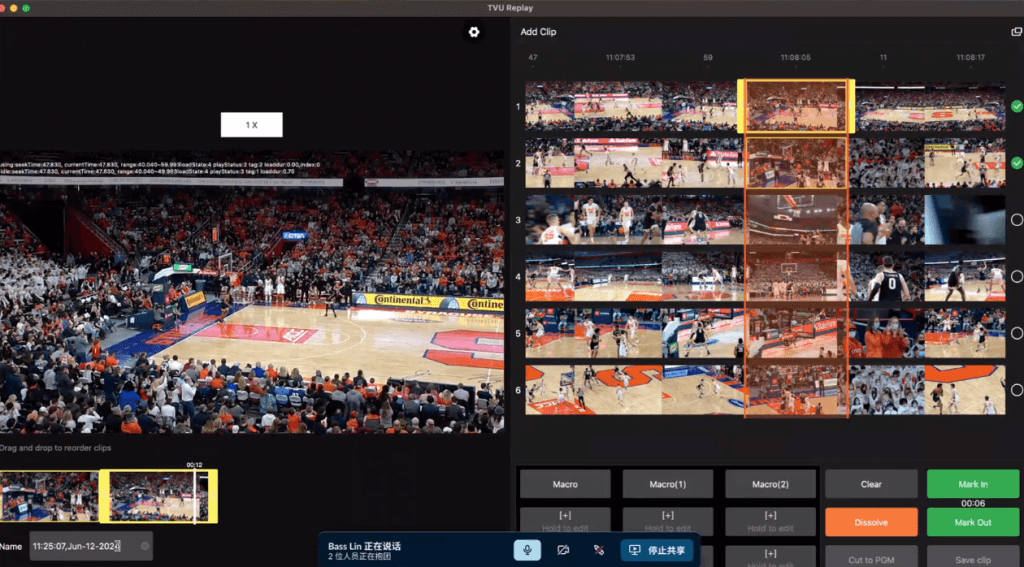
- Below the main preview window, you can select the highlighted frame and then drag and drop the frame into another location.
- Use the Name field below the preview to rename your clip if desired.
- Save the clip or Cut to PGM.
Parabola feature
The parabola feature helps you see how fast or slow your playlist is playing. You can adjust this speed using the play speed shortcut keys set up earlier. Every time you change the speed, the parabola on the playlist changes to show you the new speed setting visually.
To use the Parabola feature, complete the following steps:
- Set up your keyboard shortcuts. Tap the Settings icon and select Advanced Settings from the drop-down menu.
- Tap Keyboard Shortcuts and configure the desired Playback Speed shortcut parameters.
- Tap Developers and set the T Bar-Speed Control parameter for the speed control you set in Keyboard Shortcuts.
- Tap the Mark In and Mark Out button.
- Select a range of clips. Selected clips are displayed with yellow highlighted frames. The playlist displays in the playlist preview.
- Tap the T Bar-Control shortcut key to enable slow-motion adjustment for the clip.
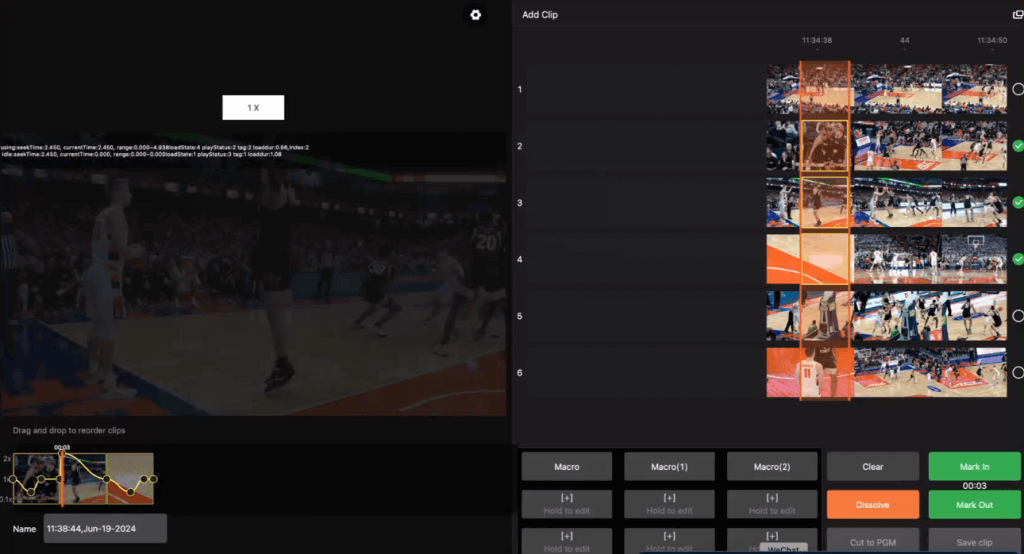
- Tap the Playback speed shortcut keys for the desired slow-motion setting. The Parabola will visually display the playlist’s slow motion.
TVU Networks® Corporation, © Copyright 2024. All Rights Reserved in All Media.
Document number: TVU Replay Quick Start User Guide Rev A EN 06-2024